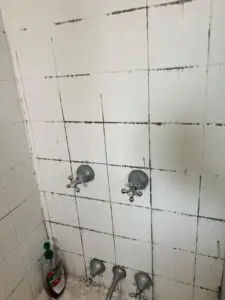
Why Mould Forms in Your Shower
Mould in the shower is a common problem, primarily due to constant humidity. Without regular cleaning, mould continues to grow, changing from reddish tones to the more typical black. In our experience as professional cleaners, we’ve used various effective methods for shower maintenance and mould removal. These range from natural solutions, such as vinegar and baking soda, to stronger bleach-based cleaners.
In this post, we’ll share how to remove mould from shower silicone without needing to replace it, a method we’ve perfected for optimal results. Unlike other blogs, we know it’s possible to clean mould from silicone effectively – and we’ll show you how!
Effective Products to Remove Mould in Your Shower
If your shower has intense black mould, it’s a sign it hasn’t been cleaned in a while. For such cases, we recommend heading straight to Bunnings to find a commercial mould remover specifically for showers. Most of these products contain high-concentration bleach, often in foam or gel form, which helps them adhere better to surfaces and remain in contact with the mould for longer.
Mould typically appears in the tile grout lines where it’s easiest to build up. Apply the product directly to the affected areas, covering them thoroughly. One of the products we’ve found highly effective, available at Woolworths, Coles, or Bunnings in Australia, is Exit Mould. You can purchase it at the following links:
Safety Recommendations
To ensure safe cleaning, please follow these steps when using bleach or other strong chemical products:
- Gloves: Use rubber gloves to avoid direct contact with the product on your skin.
- Protective Glasses: Wear protective glasses to prevent splashes into your eyes.
- Mask: Use a mask to reduce inhalation of strong fumes and protect your airways.
- Ventilation: Make sure the area is well-ventilated during product application.
- Important: We do not recommend following this guide for marble or natural tile showers, as bleach and other strong products can damage their delicate surface.
Instructions for Using Exit Mould
Initial Application: Spray Exit Mould directly onto the areas affected by mould and allow it to sit for about 10 minutes.
Treatment for Silicone Mould: To remove embedded mould in the silicone, apply the product thoroughly, covering the affected area completely, and let it sit for 30 minutes to 1 hour. This allows the product to penetrate the silicone and eliminate the mould from within. If the mould persists, repeat this process.
Final Cleaning: Rinse the shower with water, add a bit of dishwashing liquid, and use a soft scrubber to remove any remaining chemical residue.
Drying: Finally, use a squeegee to remove excess water and dry the surfaces with microfibre cloths. Congratulations – job done!
This entire process should take no more than an hour, as the chemicals do most of the work for you.
Avoid Contact With: Textiles, unpainted metals, damaged paint surfaces, or old enamel. Perform a patch test on all surfaces in an inconspicuous area before using, especially on bathtubs, sinks, tiles, coloured grout, and painted surfaces, to ensure no discolouration occurs.
Tips for Preventing Mould in the Future
To keep your shower free of mould, you don’t need to repeat the deep cleaning process every week. However, it’s essential to apply a regular product to help prevent mould growth.
Recommendation: Prepare a solution in a spray bottle with 20% bleach and 80% water. You can add a few drops of your favourite air freshener to reduce the bleach smell and create a more pleasant environment.
Instructions for Weekly Maintenance:
- Solution Preparation: Mix 20% bleach and 80% water in a spray bottle. Add a few drops of air freshener if you want to soften the bleach scent.
- Weekly Application: Spray this mixture on the shower areas each week. This will help prevent mould buildup without requiring deep cleaning.
This maintenance method is a simple and effective way to keep your shower in top condition and mould-free.
Summary: Shower Mould Removal
Keeping your shower free of mould is possible if you follow a few key steps and use effective products. As we’ve shared in this article, both deep cleaning treatments and regular maintenance are essential to prevent mould buildup, which can affect the appearance and hygiene of your bathroom. With the right professional approach and products, even deeply embedded silicone mould can be removed without needing replacements, resulting in a spotless and well-maintained shower.
Need Help with Mould Removal?
Ready to transform your shower’s cleanliness? If you need assistance with deep cleaning or want professionals to take care of mould removal in your bathroom, contact us! Our team of experts in Brisbane is here to offer you an effective and hassle-free solution with long-lasting results.
Book your service today and let us take care of the hard work for you!
Share This Post
More To Explore

Remove Toilet Limescale – Fast, Effective Cleaning Tips
Understanding Toilet Limescale and Why It Builds Up Toilet limescale buildup is a common issue that can affect both the appearance and hygiene of your

Remove Shower Mould – Easy & Safe Cleaning Guide
Why Mould Forms in Your Shower Mould in the shower is a common problem, primarily due to constant humidity. Without regular cleaning, mould continues to
Subscribe To Our Newsletter
Get updates and learn from the best
Professional house cleaning service

